BoostExcel main content
Add New Customers - Invoice Manager for Excel
There are three ways to add new customers: A) Using the Customers window; B) Using the Invoice worksheet; and C) Copying from an existing customer.
A) Add a new customer using the Customers window
- Click and select the Invoice ribbon tab if it has not already been selected.
- Click the Customers button on the Invoice ribbon tab to display
the Customers window. This window displays all customers in the database.
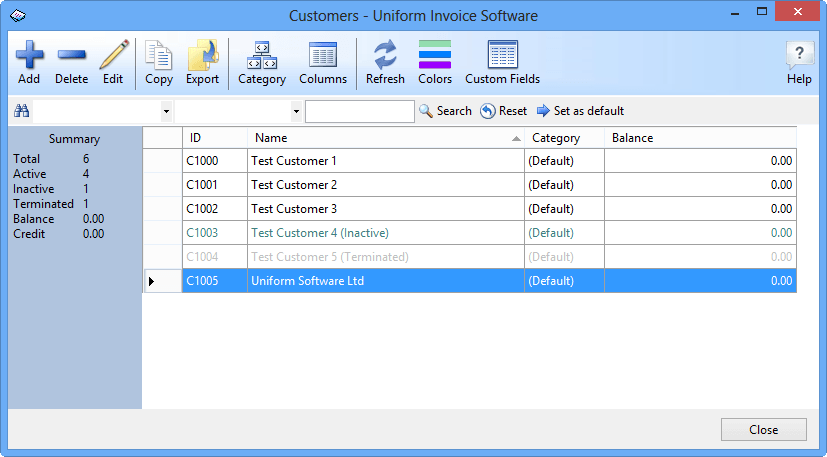
- Click the Add button.
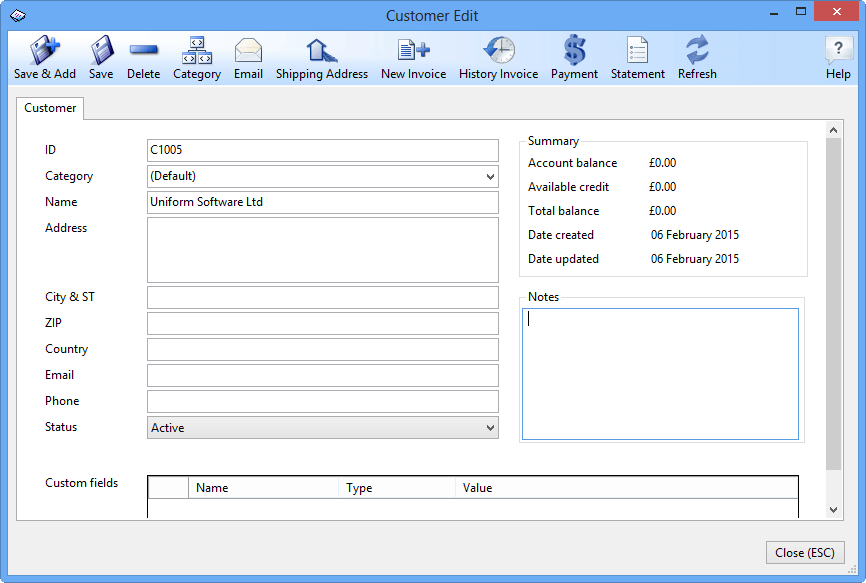
- In the New Customer window fill in your customer's information. The only required field for a customer is the Name field. All other fields are optional and a customer ID is automatically generated if one is not filled in.
- Click Save Changes button to save this customer. If succeeded, the New Customer window
becomes the Customer Edit window.
B) Add a new customer using the Invoice worksheet
- Click and select the Invoice worksheet if it isn't already selected.
- Fill in your customer's information in the appropriate field near the Bill To label. Again, the only required field for a customer is the Name field. All other fields are optional and a customer ID is automatically generated if one is not filled in.
- Click the Save As New Customer button on the task pane to create the customer.
C) Add a new customer by copying an existing one
- Click and select the Invoice worksheet if it isn't already selected.
- Click any cell in the BILL TO section. The "On-Sheet Picker" button appears.
- Click the "On-sheet Picker" button to display the Customers selection dialog box, and then double click to select the customer. All customer information will be written to the Invoice worksheet, including the customer ID.
- On the Invoice worksheet, clear the customer ID field, and modify other fields as needed.
- Click the Save As New Customer button to create a new customer.
Please move to the Customer Detail section for a detailed explanation of the Customer Edit window.